Author: Living in Korea Guide

  • Korea T-money Card Not Working|Balance, Tap, and Card Error Fixes

    Korea T-money Card Not Working|Balance, Tap, and Card Error Fixes

    If your T-money card does not work, step away from the gate, separate it from other contactless cards or your phone, and try the same card once on a different reader.

    Then have the balance and last trip checked at a subway information desk or T-money retailer. The cause may be low balance, an incomplete trip, damage, or NFC interference.

    Read the gate or bus reader message before trying again

    Pause after the first rejection and note the exact screen message, sound, location, and whether you are entering or exiting.

    A red light can mean low balance, an unrecorded previous exit, a reader problem, or a damaged card. Move out of the passenger flow and photograph the message if permitted. Show it to the subway information desk or ask the bus driver before retrying.

    Avoid repeated taps at the same reader

    Repeated attempts make it harder to tell whether a fare was accepted. Check the display and ask staff to confirm the transaction before you add money or buy another ticket.

    Isolate the card from NFC and contactless interference

    Take the T-money card out of your wallet and hold only that card flat against the reader for a full second.

    A bank card, hotel key, another transit card, or NFC phone can interfere. Test the physical card by itself. For mobile T-money, confirm NFC is enabled and temporarily disable competing transit apps. Seoul’s official guide warns that using two or more public transportation apps can cause duplicate charges or transfer errors.

    Check the balance and the card’s last recorded trip

    Ask a subway information desk or T-money retailer to check both the remaining balance and the latest entry or exit record.

    If the balance is low, recharge after staff confirms it. The updated balance should allow one clean tap. Our T-money recharge guide compares store and station top-ups; the T-money visitor guide covers basic use.

    If you forgot to tap when leaving a bus or encountered an open or failed subway gate, staff may need to inspect the trip record before the card can be used normally. Seoul’s integrated fare rules require a tap when boarding and getting off, and transfer discounts depend on the recorded exit. Explain the previous route, approximate time, and station or bus number instead of guessing which trip is still open.

    Use the correct recovery path for subway, bus, or mobile T-money

    For a subway gate error, use the station desk; for a bus error, ask the driver; for a mobile-card error, check NFC and the active transit app before changing anything else.

    At a subway station, use the information desk rather than following another passenger through a gate. On a bus, ask the driver whether to retry or use another accepted method. If you cannot identify the previous stop, our Naver Map English guide can help retrace the trip. For mobile T-money, verify NFC, the active card, and the single intended transit app before uninstalling or resetting anything.

    Keep a simple backup for the next ride

    After staff checks the failed card, keep enough cash or an accepted alternative payment method for one trip. A subway single-journey ticket is subway-only and cannot replace a transit card on a bus.

    Handle a damaged card or unexplained charge without losing evidence

    If the card fails on multiple readers, stop using it and ask an official T-money location how that specific card type can be checked, refunded, or replaced.

    Do not bend, cut, heat, or discard the card. Keep the card, recharge receipt, and error photo. T-money’s foreign-language guide routes balance refunds through eligible sales or top-up locations, but the process can depend on the card type, balance, and readability. Confirm the procedure before buying a replacement.

    Confirm the fix with one controlled test

    After the balance or trip record is corrected, test the card once at a staffed gate or on the next ride while watching the reader display.

    Success means one accepted sound, one fare or balance update, and an open gate or confirmed bus tap. For transfers, tap out and then tap in within the official window. If the card still fails on two readers after staff confirms enough balance and a closed trip, use the official refund or replacement route.

    Resolution check

    • The card is tested by itself, away from other NFC cards.
    • The balance and last trip record have been checked.
    • One tap is accepted on a staffed or clearly working reader.
    • No unresolved duplicate charge appears in the transaction record.

    Get English-language help when the cause is still unclear

    If station or retailer staff cannot resolve the problem, contact T-money through its official guide or use the Korea Travel Hotline for transportation interpretation support.

    Prepare the readable card number, card type, balance, failure time and place, reader message, and last successful trip. The Korea Tourism Organization says 1330 can help international travelers with transportation inquiries and interpretation.

    Why does my T-money card have money but still fail?

    It may be interference, an incomplete trip, a reader fault, or damage. Test the card alone and have staff check its balance and trip record.

    Can I tap the card while it stays inside my wallet?

    It may work, but nearby contactless cards or an NFC phone can cause a collision. Remove the T-money card and present only that card when troubleshooting.

    What if I forgot to tap off a bus?

    Tell station or bus staff what happened and provide the route and approximate time. Transfer discounts rely on a recorded exit tap, so the last trip may need to be checked before normal use resumes.

    Can a subway single-journey ticket be used on a bus?

    No. Seoul’s official guide says subway single-journey tickets are for subway travel only. Use an accepted bus payment method instead.

    Where should I ask for a refund?

    Start with an eligible T-money sales or top-up location and show the physical card. The exact route can vary with card type, balance, and whether the card remains readable, so confirm the current official procedure before surrendering it.

    If it is still not working

    Stop retrying the card. Ask a staffed subway desk or official T-money location to confirm the balance, last trip record, and card readability. If they cannot resolve it, contact official T-money support or call 1330 for transportation interpretation, then use a separate payment method for your next trip.

    Checked on September 9, 2026 against the official T-money foreigner guide, Seoul Metropolitan Government public transportation guidance, and Korea Tourism Organization 1330 information. Card products and service procedures can change, so confirm the current route for your exact card.

    Official resources

    Seoul public transport guidance

  • Korea Tourist eSIM Not Working|Activation, Data Line, and Roaming Fixes

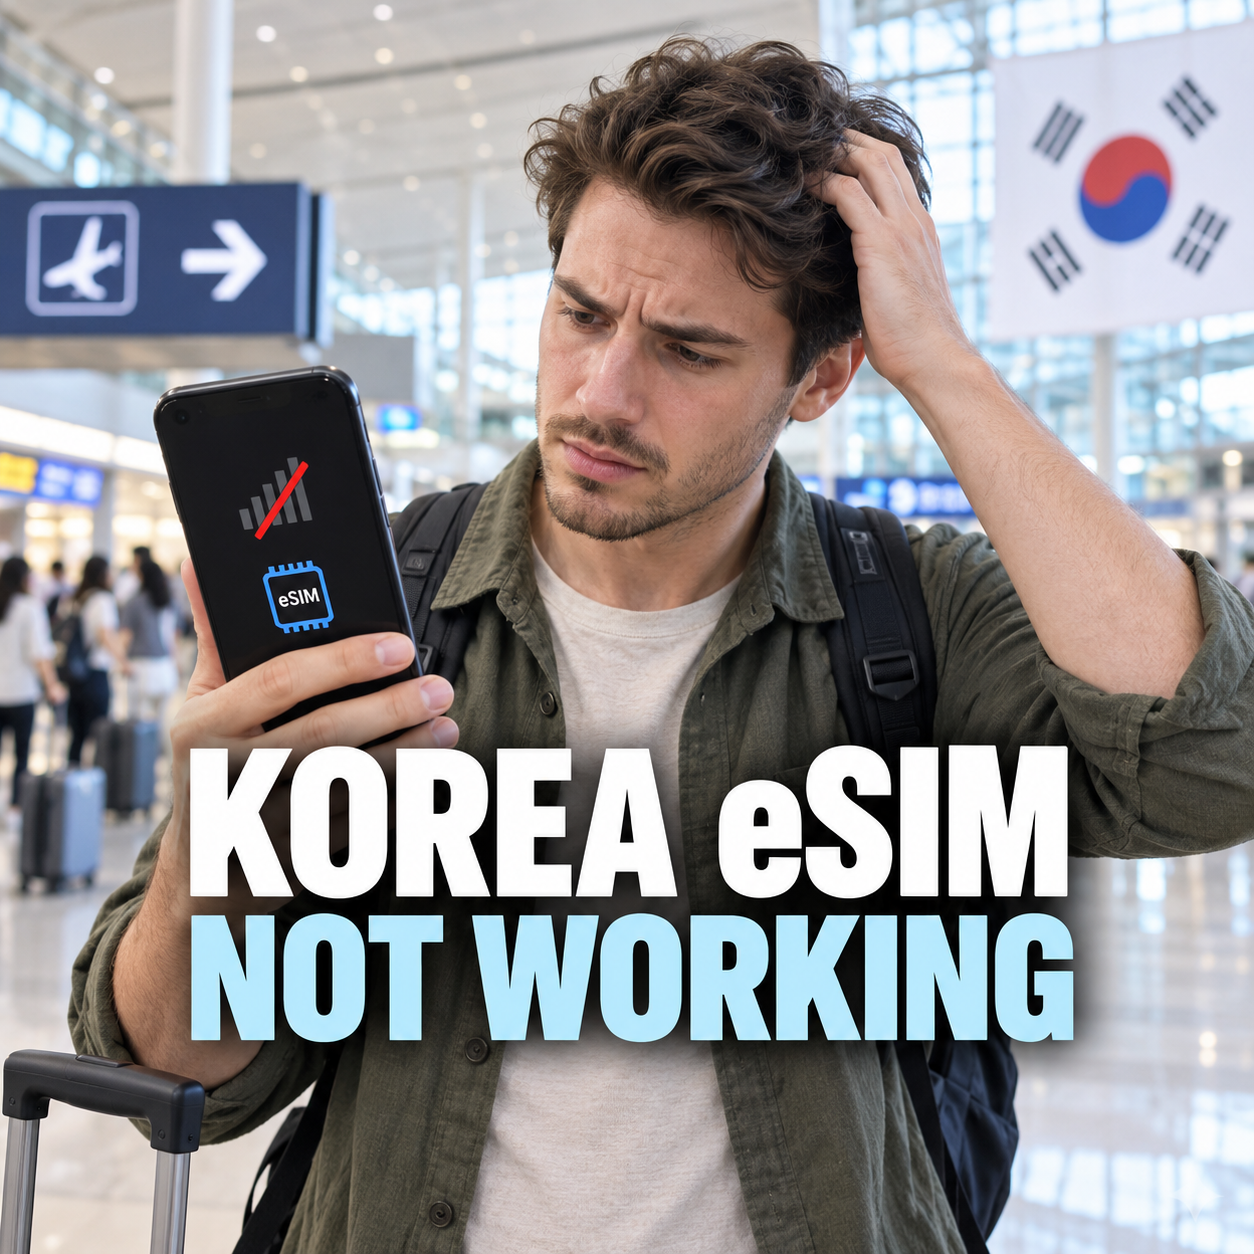
    Korea Tourist eSIM Not Working|Activation, Data Line, and Roaming Fixes

    If your Korea tourist eSIM shows No Service, first connect to Wi-Fi, confirm the eSIM line is turned on, and select it for mobile data.

    Then check that the phone is carrier-unlocked, follow your Korean provider’s roaming setting, and restart the phone. Do not delete the eSIM profile while troubleshooting: some tourist products cannot be reissued after installation.

    Confirm compatibility, carrier unlock, and the plan type

    Before changing settings, verify that your exact phone model supports eSIM, is unlocked, and matches the Korean carrier’s compatibility list.

    Next, confirm what you purchased. A data-only eSIM may not support outgoing calls, SMS, or local verification codes. LG U+’s current tourist page separates data-only and data-plus-voice products and warns that banking or government identity verification is not supported even on its voice/SMS tourist service. If you need a Korean number for reservations, compare the plan details with our Korea restaurant reservation guide without a Korean phone number before assuming the eSIM will receive every type of code.

    Do not delete the installed eSIM.

    Some Korean tourist eSIMs cannot be restored, reinstalled, or reissued after deletion. Keep the QR email and order number, but ask the carrier before removing the profile.

    Install the QR profile while connected to reliable Wi-Fi

    Open the QR code on a second screen or print it, connect the phone to Wi-Fi, and use the phone’s Add eSIM menu to scan it once.

    On iPhone, go to Settings → Cellular or Mobile Service → Add eSIM → Use QR Code. On many Samsung phones, use Settings → Connections → SIM manager → Add eSIM → Scan QR code from service provider. Menu wording can vary by model and software version. If the QR code has already been accepted, stop scanning it repeatedly and look for a new cellular plan in the SIM list instead.

    Keep the activation details offline.

    Save the carrier’s English support page, order number, and airport counter location before flying. Do not share the QR code publicly because it is tied to your purchased profile.

    Turn on the Korea line and select it for mobile data

    After landing in Korea, turn on the Korea eSIM line, select it as the cellular data line, and turn off cellular data switching.

    On iPhone, open Settings → Cellular, tap the Korea line, enable Turn On This Line, then return to Cellular Data and select Korea. On Android, open SIM manager and choose the Korea eSIM for Mobile data. If your home SIM stays enabled, disable its data roaming and automatic data switching unless your home carrier explicitly includes Korea. This prevents the phone from silently falling back to an expensive home data connection.

    Refresh the connection without erasing the profile

    Toggle Airplane Mode for about 20 seconds, turn it off, restart the phone, and test a simple website with Wi-Fi disabled.

    A signal icon without working data usually points to the selected data line, roaming instruction, plan start date, or APN. No Service on every attempt can indicate an unsupported or locked device, a plan that is not yet valid, or a carrier-side activation issue. Test maps or a normal webpage rather than relying only on a messaging app that may be using cached content. For navigation after reconnecting, see our Naver Map English setup guide.

    A working setup should show all four results

    • The Korea eSIM line is visible and enabled.
    • A Korean network name or signal bars appear.
    • The Korea line is selected for cellular data.
    • A new webpage opens after Wi-Fi is turned off.

    Separate a data problem from calls, SMS, and verification

    If mobile data works, stop changing network settings and check whether your plan actually includes a phone number, outgoing calls, and SMS.

    For urgent situations, do not wait for an app verification code. Use hotel staff, an airport information desk, or another working phone to reach the appropriate service. If the problem started after the phone was lost or replaced, follow the lost phone protection and SIM suspension steps rather than trying to move a non-transferable profile yourself.

    Contact the carrier with the exact evidence it needs

    If the eSIM still fails, stay on Wi-Fi and send the carrier your order number, phone model, EID/IMEI when requested, location, error message, and current line settings.

    Ask the carrier to confirm four things: whether the order is active, whether the device model is supported, whether data roaming or a specific APN is required, and whether the installed profile can be reissued. If the carrier confirms that the device is incompatible, keep the eSIM installed until the refund or replacement decision is documented.

    Should I install my Korea eSIM before I fly?

    You can often install it on Wi-Fi before departure, but the activation and validity rules differ by product. Check when the plan starts and do not generate data traffic on the travel line until the provider says it is safe.

    Why does the eSIM show a number but data does not work?

    The line may be enabled without being selected for cellular data. Select the Korea line, apply the provider’s roaming or APN instruction, toggle Airplane Mode, and restart before contacting support.

    Can I keep my home SIM active?

    Yes on supported dual-SIM phones, but disable home-line data roaming and cellular data switching unless your home plan covers Korea. Incoming calls or voicemail can still create charges depending on your carrier.

    Will a data-only eSIM receive Korean verification texts?

    No. Data-only service does not include SMS. Even a tourist voice/SMS line may not support Korean identity verification for banking or government services, so check the exact product terms.

    Should I reset network settings?

    Use it only after the line, data selection, roaming instruction, restart, and carrier status are checked. A network reset can remove saved Wi-Fi and other network settings, so record what you need first.

    If it is still not working

    Do not delete the eSIM. Connect to Wi-Fi and ask the official carrier to verify the order, device compatibility, start date, required roaming/APN settings, and reissue policy. Use an airport carrier counter or a physical SIM/pocket Wi-Fi only after support confirms the next step.

    Checked on September 8, 2026 against official KT, LG U+, and Apple eSIM guidance. Product terms and compatibility can change, so confirm your exact order on the carrier’s current page.

    Official resources

    KT tourist eSIM terms and instructions

  • Korea Restaurant Reservations Without a Korean Phone Number|CATCHTABLE Global

    Korea Restaurant Reservations Without a Korean Phone Number|CATCHTABLE Global

    You can reserve many restaurants in Korea without a Korean phone number by using CATCHTABLE Global and signing in with Google or Apple. First confirm that you are on the Global service, then use the restaurant page’s actual Reserve or Join Remote Waitlist option; if neither appears, that branch may require on-site waiting or another booking route.

    Start with the Global service, not the Korean version

    Create the account through Google or Apple on CATCHTABLE Global; the Korea Tourism Organization says this route does not require a Korean phone number.

    The Korea Tourism Organization says the Global service supports English, Japanese, Simplified Chinese, and Traditional Chinese. If a screen asks for Korean mobile verification, check the app name and switch to the Global version.

    Use an email you can open while traveling because notices may arrive there. Keep your name consistent with the name you will give at the restaurant; do not invent or borrow a Korean number.

    Verify the exact restaurant and branch

    Match the English and Korean restaurant names, district, address, and nearest station before choosing a time because popular brands often have several branches with different rules.

    Copy the Korean address from the restaurant page and compare it with the map pin. Our Naver Map English settings guide can help you check the branch and route without relying only on a translated name. Also confirm the date in Korea time, party size, meal period, and any age or seating notice.

    Use Reserve when a time slot is available

    Tap Reserve, choose an available date and time, enter the party details, and read the cancellation and no-show rules before confirming.

    Some reservation-only restaurants require a deposit. Korea Tourism Organization guidance says CATCHTABLE Global can accept foreign-issued cards for these deposits, but card acceptance and authentication can still depend on the card issuer and the individual booking. Do not assume every venue, card, or slot is supported.

    If payment fails, check online and overseas transaction settings and billing details. Do not submit duplicate bookings. After one careful retry, use another eligible card or the official support channel.

    Know the three waiting states

    A reservation, a remote waitlist, and an on-site waitlist are different; only act on the button and instructions shown for that exact restaurant.

    Reserve confirms a future time slot. Join Remote Waitlist places you in a live queue before arrival and may show the number of teams ahead. If the page gives on-site waiting instructions but no remote button, go to the restaurant and register there. The official guide says waiting, whether remote or on-site, does not require a deposit.

    Watch the live status and notification email after joining a queue. Travel time estimates can change, so stay close enough to arrive before your turn. The restaurant can skip or cancel a queue position under its own rules if you are late.

    If no slots or buttons appear

    Treat a blank calendar or missing button as unavailable for that branch and date, then check another date, branch, official booking channel, or the restaurant’s on-site policy.

    A listing page does not guarantee booking. Some restaurants accept only walk-ins, release tables on a schedule, or handle foreign bookings through an official website, concierge, social account, or phone call. Verify the current route with the restaurant.

    For a walk-in, arrive before the busiest meal period and show the Korean restaurant name and address.

    Confirm the booking and prepare for arrival

    Save the final confirmation, map the branch, monitor email or the app, and arrive according to the venue’s stated time rather than relying on a general rule.

    Before leaving, save an offline screenshot. Check the Korean name, address, entrance notes, party size, and reservation holder. Show the confirmation when staff ask for the booking name.

    The process is resolved when the correct branch and details appear in your account and confirmation message. If the restaurant cannot find it, show the booking reference and payment record, confirm you did not select another branch or date, and contact CATCHTABLE Global support or the restaurant through the official listing. Do not make a second paid reservation until the first booking’s status is clear.

    Frequently asked questions

    Most failures come from using the Korean service, choosing the wrong branch, confusing a waitlist with a reservation, or missing a venue-specific rule.

    Do I need a Korean phone number for CATCHTABLE Global?

    Korea Tourism Organization says Global users can create an account through Google or Apple without one. A restaurant may still request contact details for its own operation.

    Can I use a foreign credit card?

    The official guide says foreign-issued cards can be used for deposits on CATCHTABLE Global. Final authorization still depends on the booking and card issuer.

    Why is there no Reserve button?

    That restaurant or branch may not accept reservations through the service, or only on-site waiting may be available. Follow the exact instructions on the detail page.

    Does joining a remote waitlist guarantee a table time?

    No. It gives a live queue position, not a fixed reservation time. Monitor the status and be ready to arrive under the restaurant’s rules.

    What should I do if the restaurant cannot find my booking?

    Show the confirmation and reference, recheck the branch, date, and name, then contact the official service or restaurant. Clarify the first status before booking again.

    Related guides

    Korea Tourist eSIM Not Working|Activation, Data Line, and Roaming Fixes

    Official resources

    Korea Tourism Organization: CATCHTABLE Global

  • Lost Phone in Korea|Track, Report, Suspend SIM, and Protect Accounts

    Lost Phone in Korea|Track, Report, Suspend SIM, and Protect Accounts

    If you lose your phone in Korea, use another device to locate and lock it first, then retrace the last safe place where you used it. If the location is unfamiliar, the phone was taken, or meeting the finder feels unsafe, do not recover it yourself—contact the police and your mobile carrier.

    Locate and lock the phone immediately

    For Android, open Google Find Hub; for iPhone, open Find My or iCloud.com/find, then select the missing device and mark it as lost.

    Use Play Sound only when the phone may be nearby. A map pin is an estimate, especially indoors or underground. Save a screenshot of the location, time, battery status, and device name before the information changes.

    Google says Find Hub can locate, secure, or erase a supported Android device when the required account and device settings are available. Apple says Lost Mode locks the device and helps protect account access. Add a safe callback number that is not the missing phone, but do not reveal your hotel room, home address, passport number, or other sensitive details.

    Check the last venue and transit operator

    Call the exact café, hotel, taxi service, station, airport, or train operator where you last used the phone and describe the time, case, model, and lock-screen image.

    Record the line, direction, boarding and exit stations, approximate car position, and time. For a taxi, keep the receipt, payment record, vehicle number, or booking-app trip details.

    Report the loss through Korea Police channels

    For an ordinary loss, use the Korea Police Civil Services portal or visit a nearby police station, police box, or patrol division; if it was stolen or you face immediate danger, call 112.

    The official police service states that a lost-property report can be filed online or in person and that no supporting documents or fee are required for the basic report. It also provides an English lost-item report form. Online access may still require identity verification, so short-term visitors who cannot complete login should visit the nearest police facility.

    Prepare the brand, model, color, case, distinctive marks, IMEI or serial number if available, last known time and place, and a safe contact method. Keep the receipt or management number. If you also lost your passport, use the separate lost passport steps in Korea because embassy and departure procedures are different.

    Suspend the SIM without losing account access

    If the phone appears stolen or recovery is unlikely, contact the Korean carrier or travel-SIM provider and ask to suspend the line, block replacement misuse, and explain the replacement process.

    Before suspension, confirm that you can sign in to your email, Apple Account or Google Account, banking apps, and travel services from another trusted device. Save backup codes or switch important two-factor verification to a method you still control. Never give a caller or text sender your screen passcode, verification code, or account password.

    Protect payments and important accounts

    Review the primary email account, mobile wallet, banking, messaging, cloud storage, and password manager for unknown sessions or changes.

    Start with the email account used for password recovery, then secure financial and messaging accounts. Use official apps or websites typed manually, not links sent by someone claiming to have found the phone. Apple explicitly warns that it will not contact you to say a missing iPhone was found and advises against sharing passcodes or verification codes.

    Contact your card issuer if wallet cards or banking access may be exposed.

    Erase only after recovery options are exhausted

    Remote erase is the final privacy step because it is irreversible and can reduce or end later tracking capability, depending on the device and setup.

    Google warns that a factory reset permanently deletes device data and removes the Android device from Find Hub. Apple advises trying other recovery steps first and not removing a stolen device from Find My, because that removes Activation Lock. Read the confirmation screen carefully before sending an erase command.

    Frequently asked questions

    The safest plan is to lock first, document the device details, use official recovery channels, and separate an ordinary loss from suspected theft.

    Can I track a phone after the SIM is suspended?

    It may still receive location or lock requests over Wi-Fi, but results depend on prior settings, power, connectivity, and the device platform. Ask the carrier what the suspension affects.

    Should I call 112 for every lost phone?

    Use the lost-property service or a police facility for an ordinary loss. Call 112 when theft, immediate danger, or an active crime is involved.

    What if Find My or Find Hub was not enabled?

    Call the last venue and transit operator, file a police report, suspend the SIM when appropriate, and secure the recovery email and other critical accounts.

    How do I know the case is resolved?

    After recovery, unlock the phone yourself, inspect account activity, restore the SIM, and test calls, data, wallet access, and account recovery.

    Related guides

    Korea Tourist eSIM Not Working|Activation, Data Line, and Roaming Fixes

    Official resources

    Google: Find, secure, or erase a lost Android device

  • Lost Passport in Korea|Police Report, Embassy, and Departure Steps

    Lost Passport in Korea|Police Report, Embassy, and Departure Steps

    If your passport is lost in Korea, secure your phone and cards, search the last controlled location briefly, then contact your passport-issuing embassy or consulate immediately. Report theft to police; for an ordinary lost item, use Korea’s lost-property channels while the embassy explains cancellation and replacement.

    Do not go to the airport hoping a photo or photocopy will work. A reported passport may be cancelled, and only your issuing authority can confirm which replacement document you need.

    First 15 minutes: protect yourself and retrace

    Freeze exposed payment cards, write down the last confirmed location, and make one focused search without delaying an urgent theft report.

    Check the hotel safe, taxi seat, restaurant counter, station gate, airport tray, and the bag pocket used at check-in. Give staff a time window and plain description, but do not send a passport scan through an unverified account.

    A quick recovery is possible, but an approaching flight or signs of theft should move you to reporting and consular contact now.

    Choose the correct Korean reporting channel

    Call 112 for theft or immediate danger; for a lost item, use 182 or LOST112, and use 1330 when tourist interpretation is needed.

    Korea Tourism Organization’s official travel guide directs theft victims to police at 112 and lost-item cases to 182 or LOST112. It also lists the 1330 Korea Travel Helpline for multilingual tourist help and interpretation.

    Record the date, approximate time, place, police station or reference number, and whether other identity documents were taken. A police report can document the circumstances, but it does not itself create a replacement passport.

    Contact the embassy that issued your passport

    Use the official website of your own embassy or consulate in Korea and state your nationality, location, departure date, and whether the passport was lost or stolen.

    Procedures differ by nationality. Ask whether you need an appointment, police report, passport photo, identity evidence, application form, fee, or travel itinerary. United States guidance, for example, tells its citizens to report the passport promptly, appear at an embassy or consulate for replacement, and disclose imminent travel; that list is not a universal checklist for other nationalities.

    Prepare for replacement without guessing requirements

    Gather whatever identity and travel evidence you still have, but let the embassy confirm the exact document set and whether it will issue a full or emergency passport.

    Useful items may include a passport copy, another photo ID, a recent photo, police reference, itinerary, and proof of citizenship. Send files only through the embassy’s confirmed channel. For a child or a theft involving every ID, disclose that at first contact because extra steps may apply.

    Check residence, visa, and arrival records

    After a new document is issued, foreign residents should ask 1345 whether and how their passport information must be updated; visitors should verify any travel authorization or arrival record tied to the old number.

    Korea Immigration Service describes 1345 as its multilingual immigration and living-information contact center. Call with your residence status, old and new passport details, planned departure, and the date the replacement was issued. Do not assume that an embassy replacement automatically updates Korean records.

    Rebuild the departure plan

    Confirm the replacement document first, then ask the airline and every transit-country authority whether that document and route are accepted.

    An emergency travel document may have route or validity limits. Give the embassy your full itinerary, including transit airports, before changing a ticket. After issuance, contact the airline using the new document details and confirm whether online check-in must be replaced by counter check-in.

    Do not book a non-refundable flight based on an estimated consular time. For departure within hours, contact the embassy’s official emergency channel and the airline.

    Frequently asked questions

    The key distinction is simple: Korean services document and search the incident, while your passport authority decides cancellation and replacement.

    Should I wait for LOST112 before contacting my embassy?

    No if departure is near, theft is suspected, or the passport may be misused. You can keep checking lost-property channels while following the embassy’s instructions.

    Can I fly with a passport photo on my phone?

    A copy helps prove identity but is not a travel document. Obtain the valid replacement specified by your issuing authority and accepted for your route.

    What is the exact next step if the case is still unresolved?

    Call the embassy’s official emergency contact with your incident details and itinerary. Residents should also call 1345; imminent travelers should keep the airline informed and avoid the airport until document acceptance is confirmed.

    Related guides

    Lost Phone in Korea|Track, Report, Suspend SIM, and Protect Accounts

    Official resources

    Korea Police LOST112

  • Korean Address Format in English|Road Name, Unit, and Postal Code

    Korean Address Format in English|Road Name, Unit, and Postal Code

    To write a Korean address in English, search the official road-name address site, copy its English result, add the apartment building and unit in front, and finish with the five-digit postal code and “Republic of Korea.” Do not translate a name yourself when an official Romanized result is available.

    Use this pattern: unit, building number, road name, district, city or province, postal code, Republic of Korea. Trust the official result over a template.

    Find the official English road-name address

    Start with the government English address search and match the building number and road name before copying anything.

    Enter a road name, building number, or known Korean address in the official Juso service. Compare the result with your lease, bill, or building sign. Similar building names exist, so the district and number must also match.

    Copy the English result exactly, including hyphens in names ending in -daero , -ro , or -gil .

    Put the parts in the right order

    In English notation, move from the detailed location toward the larger district: unit, building number and road, district, city or province.

    The official guide places the building number before the road—for example, “9, Gukhoe-daero 62-gil.” A comma separates the unit from the building number. Seoul and metropolitan cities may omit -si; other regional suffixes can remain Romanized.

    Add the apartment building and unit

    Place the detailed address before the road-name address, and preserve the building and unit identifiers used by the property.

    For an apartment, use “building-unit” or the Romanized “101-dong 1203-ho” shown in the official guide. For an office or shop, include the floor or room when it identifies the destination. Do not confuse a neighborhood -dong with an apartment-building -dong.

    Ask the landlord, hotel, or recipient which unit notation they use.

    Verify the five-digit postal code

    Use the postal code returned for the same road-name address; never reuse a code from a nearby building or an old six-digit record.

    Korea Post uses a five-digit basic district number. Search with the full road-name address and confirm that the English and Korean results point to the same building.

    For international mail, put the postal code close to the city or province and keep “Republic of Korea” on the final line.

    Fix forms that split or reject the address

    Keep the official wording unchanged and split it across fields by function instead of shortening the road name.

    Put the apartment and unit in an address line, keeping the building number and road together. Use the district as locality if needed, put the city or province in its matching field, and select South Korea or Republic of Korea.

    If a form rejects hyphens or commas, remove only the punctuation the form forbids and keep a screenshot of the official result. Do not convert -gil to “Street” or guess an English apartment name just to satisfy validation.

    Check the final version before submitting

    A finished address must lead to the correct building and the correct unit in both English and Korean.

    Resolution check: compare the English result with the Korean address and verify the building number, road, district, postal code, building, and unit. For delivery, keep both versions and confirm the contact number.

    If unresolved: save the error, Korean address, and official English result. Ask the form operator which field failed; use Korea Post for postal-code uncertainty; contact the responsible public office if an official record itself is wrong.

    Frequently asked questions

    Most failures come from a missing unit, a mismatched postal code, or a form that expects the same address in separate fields.

    Should I write South Korea or Republic of Korea?

    Use the country label offered by the form. On a free-text international address, “Republic of Korea” is the official style shown by Korea Post.

    Can I put the postal code before the city?

    Follow the form’s dedicated postal-code field. On a label, clarity and the correct five digits matter more than forcing one layout.

    Do I need the apartment name?

    The official guide says optional complements such as an apartment or neighborhood name may be omitted in a brief notation. The building and unit identifiers should still be clear.

    What if I only know the land-lot address?

    Search it in the official service and select the matching road-name result. Do not manually rearrange the land-lot parts into an English road address.

    Can I use only the English version for a Korean courier?

    A courier may process it, but keeping the Korean address and a reachable local contact number reduces ambiguity at the final delivery step.

    Official resources

    Government road-name address guide, chapter 5

  • Korea Mobile Residence Card|IC Card, QR Setup, and Phone Change

    Korea Mobile Residence Card|IC Card, QR Setup, and Phone Change

    To get a Korea mobile residence card, install the official Mobile ID app on a phone registered in your own name, then use either an IC-enabled physical residence card or an in-person QR code from an immigration office. Choose the route based on the card you already have, not on which route looks faster.

    The mobile card has the same legal effect as the physical one, but a bank or other service may still have channel-specific support. Keep the physical card available for important procedures.

    Check eligibility and your phone first

    Confirm that you are a registered foreign resident aged 14 or older and that the smartphone is in your name before booking a visit or replacing a card.

    Official guidance limits issuance to one eligible smartphone in the holder’s name. The official leaflet lists Android 8.0 or later or iOS 16 or later, biometric authentication, and NFC support. If verification fails, ask your carrier whether the subscription is registered in your name.

    You still need a valid physical residence card. Do not install an app from a link in an unsolicited text message; use the official app-store listing reached through the government Mobile ID site.

    Identify an IC card or an older card

    Look for the Mobile ID symbol on the physical residence card: the symbol indicates the IC-enabled version that can be tagged to the phone.

    With an IC residence card, open the Mobile ID app, select the mobile foreigner residence card, enter the required issuance information, and hold the card against the phone’s NFC area as instructed. Complete facial verification and wait for the app to show that issuance is finished. Remove a thick or magnetic case if the tag repeatedly fails.

    An older non-IC card is still eligible, but it uses the office QR route. Book or confirm the correct immigration office, install the app before arrival, request mobile-card issuance, scan the QR code shown at the counter, and complete facial verification there.

    Finish setup and test the digital card

    Do not stop at facial verification; reopen the app and confirm that your name, card type, and active status display correctly before relying on it.

    1. Restart the official app.
    2. Unlock it normally.
    3. Check that the card is active.
    4. Test it at a service that advertises Mobile ID support.

    Government guidance describes use at public institutions, hospitals, convenience stores, and financial institutions, but support can vary by institution and channel.

    Recover after a phone change or app deletion

    Use the same issuance route again: retag an IC residence card, or revisit immigration for a new QR code if the original mobile card was QR-issued.

    First install the official app on the replacement phone and confirm that the mobile subscription is still under your name. IC-card holders can generally issue again by NFC tagging and facial verification. Holders of older cards who used an office QR code must return to an immigration office because the earlier QR code is not a reusable backup credential.

    If reissuance fails, check NFC, biometrics, operating-system eligibility, and carrier identity data. Never enter personal details on unofficial troubleshooting pages.

    Act immediately if the phone is lost

    Report the lost phone through the official Mobile ID service so the mobile card is locked, then secure the mobile line and payment accounts separately.

    The Korea Immigration Service states that a loss report on the Mobile ID website locks the app. Also suspend the SIM and use official lost-device controls. A Mobile ID lock does not freeze banking or every other account.

    Resolution check and exact next steps

    Setup is complete only when the official app shows an active mobile residence card and a supported verifier can read it without exposing unnecessary personal details.

    Resolution check: confirm the card opens after the app is restarted, the displayed identity matches the physical card, and the service you plan to use accepts Mobile ID. Keep the physical card and passport available for procedures that specifically request them.

    If unresolved: record the exact error, your phone model and operating-system version, whether the physical card has the Mobile ID symbol, and whether your line is registered in your name. Call 1345 or contact the responsible immigration office with those facts; for a bank-only rejection, ask the bank whether its branch or app currently supports the mobile foreigner residence card.

    Frequently asked questions

    The decisive questions are whether your physical card has an IC chip, whether the phone is in your name, and whether the receiving service supports the credential.

    Can I issue it on two phones?

    No. Official guidance limits issuance to one smartphone registered in the cardholder’s name.

    Can an older residence card still be used?

    Yes. Visit an immigration office and use the on-site QR issuance route instead of NFC tagging.

    Does every bank accept it?

    Support has expanded, but each institution can have its own rollout and channel rules. Confirm with the specific bank and transaction type.

    Do I still need the physical card?

    Keep it. The mobile credential is legally valid, but a procedure may still require the physical card, passport, or another original document.

    What happens if I delete the app?

    Reissue it. An IC-card holder can normally retag the card; a person who used the office QR route must visit immigration again.

    Official resources

    Ministry of Justice: Mobile Residence Card

  • Korea Tax Refund Guide|Immediate, Downtown, and Airport Steps

    Korea Tax Refund Guide|Immediate, Downtown, and Airport Steps

    For a Korea tax refund, first confirm that the shop participates, show your passport, and keep the refund receipt and unused goods. Then use the route printed on the receipt: an immediate deduction at the store, a downtown refund, or customs validation followed by payment at the airport.

    Do not pack everything before checking the receipt. If customs must inspect an item that will go into checked baggage, you need to complete that step before the bag disappears at airline check-in.

    Check whether you and the purchase qualify

    Use the official eligibility rules before counting a refund as part of your budget; nationality, length of stay, purchase value, item condition, and departure timing all matter.

    The official VISITKOREA guide currently says a qualifying receipt starts at KRW 15,000. It covers non-Korean visitors staying less than six months, with separate conditions for overseas Koreans. Goods must be new, unused, and taken out of Korea within three months. Participation still depends on the store and product.

    Look for a Tax Refund or Tax Free sign before paying. Ask the cashier whether the refund is immediate or whether you will receive a voucher for later processing. Present the same passport you will use to leave Korea, and check that your name or passport details, purchase amount, and refund operator are readable on the document.

    Choose the route printed on your receipt

    An immediate refund reduces the tax at purchase, while a general refund requires a voucher and may be completed downtown, by mobile service, or at the airport.

    For an immediate refund, the store deducts eligible tax when you present your passport. Official rules include transaction and trip-total limits, so let the cashier’s system determine eligibility and keep the receipt. For a general refund, you pay the tax-inclusive amount and receive a voucher for the downtown, mobile, mailbox, or airport route supported by the named operator.

    A card receipt alone is not always the refund voucher.

    Prepare before leaving for the airport

    Sort receipts by refund operator and place the matching goods, passport, and payment card where you can reach them without opening checked luggage.

    1. Check that every voucher is legible.
    2. Separate checked-bag goods from carry-on items.
    3. Allow time for a possible customs inspection.
    4. Confirm your terminal and current refund location.

    Refund timing depends on the operator and payment method. Card processing and currency conversion can affect when and how the amount appears.

    Complete customs validation before bag drop

    Scan or present the voucher as directed, and if the system requests inspection, show customs your passport, goods, and sales document before checking the relevant bag.

    At Incheon Airport, follow Domestic Tax Refund and Customs signs while you still have the goods. If a kiosk requests inspection, do not check the relevant bag until customs completes confirmation. After validation, follow the voucher or screen to the correct payment point.

    The airport’s current English page lists public-area and airside refund points in both terminals. Locations and hours can change, so check the live page on departure day.

    Verify that the refund is actually complete

    A successful scan is not always the final payment; keep the completion slip and confirm cash collection or the card-refund status before you leave the service area.

    For cash, count the amount and keep the receipt. For a card refund, save the operator’s confirmation. If payment does not arrive, contact the operator printed on the voucher with the reference, purchase date, and departure confirmation.

    If you use an overseas card or need cash at another point in the trip, our Korea ATM guide for foreign cards explains card-network and machine checks. ATM withdrawal and tourist tax refunds are separate transactions, so keep their receipts separate.

    Frequently asked questions

    The receipt and refund operator control the route, so use these answers to identify the next desk or document rather than guessing.

    Can I get a refund with only a card receipt?

    Usually you need the tax-refund document issued by a participating store. Return to the retailer promptly if the designated voucher was not issued.

    Can I use the item before departure?

    Official guidance describes eligible goods as new and unused. Keep the product unopened until the refund and outbound checks are finished.

    What if my purchase was refunded immediately in the store?

    Keep the receipt and take the goods out of Korea within the applicable period. Follow any additional instruction printed by the retailer or operator.

    My goods are already in checked baggage. What now?

    Tell the refund operator or customs desk exactly what happened. If inspection is required and the bag cannot be retrieved, the refund may not be completed.

    Where do I go if the refund never reaches my card?

    Contact the refund company shown on the voucher, not the airport generally. Provide the voucher number, purchase details, departure date, and saved completion confirmation.

    Official resources

    Korea Tourism Organization: Tax refund guide
    Duty-free and tax-refund eligibility

  • Korean Emergency Alert in English|Set Up Emergency Ready App

    Korean Emergency Alert in English|Set Up Emergency Ready App

    If a Korean disaster alert is unreadable, install the official Emergency Ready App, choose English, select your regions, and allow notifications and location. You can then read supported alerts and find nearby safety facilities.

    Checked August 26, 2026, against official guidance. It never replaces 112 police or 119 fire and ambulance service.

    Set it up before the next alert

    Verify the government publisher, set English, choose your current and next regions, enable notifications and location, then open the shelter map once.

    Quick route: official app → English → regions → permissions → alert list and map → phone settings if alerts are missing.

    1. How do I identify the official app?

    Search “Emergency Ready App” and confirm that the provider is Korea’s Ministry of the Interior and Safety. Do not install from a link in an unknown message.

    The ministry’s June 15, 2026 notice says the app provides alerts in 22 languages, safety guides, and shelter information. Install it from the official store on working data. The normal result is the main safety screen without a payment request.

    2. How do I switch alerts to English?

    On Android, choose English inside the app settings. On iPhone, use the app language option in iOS settings; Seoul also directs users to Settings → General → Language & Region when needed.

    Reopen the app and view a recent alert. Supported content should appear in English. Keep the Korean place name so responders can identify it. Prepare Naver Map in English for directions.

    Keep both versions

    Use English to understand the action and the Korean place name to confirm the exact district with hotel staff, police, firefighters, or a driver.

    3. Which regions and permissions should I select?

    Choose where you are staying and your next destination, then allow notifications and location. The alert list should match those areas and the facility map should find nearby services.

    Add a destination before departure; remove old regions later. Do not disable all alerts.

    SettingChooseNormal result
    RegionStay plus next tripLocal alerts appear
    NotificationsAllowNew notices display
    LocationAllow for nearby servicesFacilities can be found

    4. What should I do when an alert arrives?

    Read the hazard, location, time, and required action in that order. If your area is included, follow the official instruction first and verify later updates through the app or National Safety Portal.

    1. Hazard: identify flood, typhoon, earthquake, fire, heat, snow, or another risk.
    2. Place: compare the city or district with your map position.
    3. Action: avoid, evacuate, shelter, or wait as instructed.
    4. Update: reopen the alert list for later notices.
    5. Urgency: call 112 for police or 119 for fire and ambulance.

    The multilingual 1330 Travel Helpline can assist travelers and connect related services, but it must not delay a direct 112 or 119 call.

    Never approach a hazard to check it

    Stay away from flooded underpasses, dangerous coasts, smoke, damaged buildings, and restricted zones. Follow evacuation staff even if your usual map route remains open.

    5. Why are English alerts not arriving?

    Check language and region first, then notifications, location, mobile data, Focus mode, and battery restrictions. If alerts appear in app history but not as banners, phone notification settings are the likely cause.

    Allow lock-screen alerts, remove background-data restrictions, and restart the phone. If the Safety Portal shows a current alert but the app does not, update the official app. Reinstall only after noting your regions, then grant permissions again.

    Ready check

    Official app, English, correct regions, both permissions, loaded alert history, and working facility map mean the setup is complete.

    6. How do I confirm it is fixed, and what comes next?

    The setup is fixed when English opens, your regions remain saved, recent alerts load, and the facility map finds your area. Test all four results instead of waiting for a real emergency.

    Verify the fix: reopen the app, read one saved alert, and locate one nearby facility. If the problem remains: give 1330 or official support your app version, phone model, system, region, and notification screen. Use the Safety Portal and emergency numbers meanwhile.

    FAQ: Frequently asked questions

    Prepare the app early, but keep official emergency numbers as the final route whenever danger is urgent or the app is unavailable.

    Q1. Will every local alert be translated perfectly?

    A. Do not assume that every place name or local notice will be fully translated. Keep the Korean original and confirm an unclear instruction with local staff or 1330.

    Q2. Can family outside Korea monitor my destination?

    A. They may select the same region, but you must follow instructions for your actual location.

    Q3. What if the map shows the wrong district?

    A. Refresh location, check phone location permission, and manually select your real region. Compare the Korean address with a map before moving.

    Q4. Is every shelter shown in the app open now?

    A. A listed facility is not proof of current access. Follow the live alert, signs, and officials directing people to an operating location.

    Q5. Will hotel Wi-Fi be enough?

    A. It works only while connected. Keep mobile data or another official information route available.

    Q6. Does a louder sound always mean a more serious alert?

    A. Do not judge severity by sound or color alone. Read the named hazard, affected place, and required action.

    Q7. How should I prepare for a child or older traveler?

    A. Save the hotel address and 112, 119, and 1330 on paper, agree on a meeting point, and keep the responsible adult’s phone configured.

    Install the verified app, set English and the right regions, allow the required permissions, and test both the alert list and map. During a real warning, follow the official action and call 112 or 119 without delay for immediate danger.

    Official resources

    Ministry of the Interior and Safety: Emergency Ready App